


Welcome to the world of raw, uncooked veggie burgers, cakes, squares, kale chips, onion bread, raw pizza and so much more!
"Is this thing even on?"

If you’re dehydrating for the first time, I want you to take your dehydrator out, plug your dehydrator in and make sure that it works! Chances are that you’ve purchased your dehydrator online and it may have traveled a long way to get to your door.
When I bought my very first dehydrator, I prepared my very first dehydrator recipes (a variety of raw crackers), filled all the sheets with my recipes, and then went to turn on my dehydrator–and nothing happened. Talk about disappointment!
I eventually had to ship my dehydrator back to the manufacturer because there was something wrong with my fan and it wouldn’t turn on so I couldn’t dehydrate anything. It was tragic! So don’t make that mistake. Instead, just take a minute to plug it in, set the temperature to 105 degrees, and make sure that the fan and heating element come on. It should be easy to tell…Is it getting warm inside and can you hear the fan?
If so, then you’re ready to get into dehydrating!
Setting up your dehydrator in your home
Where you set up your dehydrator will depend on the size of your kitchen and whether you live in a house or an apartment, and a variety of other factors.
In terms of choosing the best spot for your dehydrator, you will want to balance accessibility with practicality and aesthetics.
Accessibility:
You don’t want your dehydrator to be stored away in your attic or deep in your basement because it will seem like a “big deal” to have to get your dehydrator set up. You don’t want dehydrating to be a ”big deal.” Instead, you want dehydrating to be accessible and at your fingertips!
Ideally, your dehydrator should be plugged in and ready to go at all times. If you are able to have it plugged in ad ready to go 24/7 in your home, it’s a good idea to drape a large clean tea towel over your dehydrator when not in use, so that it’s protected from dust, splatter and sunlight.
Practicality and Aesthetics:

On the other hand, if you have a small, busy kitchen with very little counter space, it might not be practical for you to keep your dehydrator right out in the open on the counter. If this is the case, hopefully you can find a spot that isn’t too far away. Remember that sometimes your dehydrator will be out for 24 hours or more, so don’t place it somewhere that’s too in the way.
If you don’t have much room in your kitchen, you may even want to set up your dehydrator in the garage. Garages can be a great solution because they can allow you to keep your dehydrator plugged in and ready to go 24/7, but they are not taking up too much space in your main kitchen.
Of course, you’ll only want to do this if your garage is heated, well organized and clean! Bear in mind that some recipes, like kale chips, for example, can leave a bit of a mess when you open and close the trays, so take this into consideration.
In my case, I keep my dehydrator in my kitchen area, tucked away in my pantry. However, it’s very easy for me to move in and out, and there’s a clear area in my kitchen where I always put my dehydrator when it’s in use.
I have a raw friend who eventually removed her old microwave and placed their dehydrator in its place. However, this doesn’t always work and will depend on whether the sizes of your microwave and dehydrator are compatible.
Using parchment paper and teflex sheets

In terms of other utensils and products that you’ll require, the great thing is that there aren’t many!
However, in addition to the mesh trays (drawers) that come with the dehydrator, you’ll also need something to lie on top of the mesh trays. This is because most of the trays (drawers) are designed to let air flow through them, so they have little holes or sometimes big grids with big gaps to let air move freely inside the unit. However, the negative side effect is that if you have a very wet batter (ex. cracker batter) or very small ingredients (for example, drying herbs like rosemary) the holes in the trays (drawers) will let food fall down the layers.
The solution to this problem is to line the main trays with removable sheets that have no holes (or very tiny holes). The two main options for removable sheets are teflex sheets or parchment paper.
Teflex or paraflexx sheets: Many dehydrators come with removable inserts that sit on top of your dehydrator’s sliding trays (drawers). For example, Excalibur dehydrators generally come with “teflex” sheets. These trays are flexible and can be removed and washed.
Parchment paper: Parchment paper is disposable, and can be purchased in rolls in your grocery store next to aluminum foil, saran wrap, ziploc bags, and that sort of thing. Please note that parchment paper is also called “bakery paper” or “bakery release paper.” Basically, it is very similar to wax paper; however, the key difference is that wax paper will stick to foods whereas parchment paper will be easy to remove. Do not use wax paper, foods will stick to them and will ruin your recipe!
Quick tips:
- Never put any moist or sticky undehydrated food directly onto your dehydrator trays (drawers). Always line the tray with parchment paper or a teflex sheet first. This is to protect your mesh trays (drawers) so that they don’t get dirty because the mesh trays (drawers) can be annoying to clean.
- Once your food has been dehydrating for a few hours and/or is no longer messy, drippy, sticky, etc, then you can go ahead and remove your liners.
- Generally, you do want to remove your liners at some point so that air can circulate freely and your recipes can dehydrate properly (one exception to this is when making kale chips, I generally don’t remove my liners at all because kale chips are really flakey and they can make a big mess so I just leave them alone).
Dehydrating times
As you know, when dehydrating raw food it is important to keep the enzymes alive by dehydrating at 105 degrees Fahrenheit (40.6 degrees Celsius) or lower.
However, I recommend turning your dehydrator on “high” (145 degrees) for about 1.5 hours when first putting food in the dehydrator, and then decreasing the temperature to 105 degrees after 1.5 hours or so.
I suggest this because the initial warmer temperature will help to take away a lot of the moisture at first, and the thinking is that it takes a while for your dehydrator to climb up to “high” and it also takes quite a while for the food to actually get to the temperature that the dehydrator air is at so it is still safe for raw foodists.
One of the best side-effects of setting your temperature higher at first is that it’s good at getting rid of the initial moisture quite quickly. Increasing the temperature at the beginning of cooking time is common practice in the raw food community. If you are not mindful about turning the heat back down after 1.5 hours, yes, your food will be heated above 105 degrees. However, this risk is warranted. That initial heat blast can really save you a lot of time and can accelerate the dehydrating process by quite a bit, even by 50% sometimes.
For me, I do strive to live a 100% raw lifestyle; however, I also make some slight tweaks to the “rules” in order to ensure that I can stay raw over the long-term.
This slight temperature increase is a rule-bender that many raw fooders do, and it is worth it.
How to know when dehydrated recipes are “done”
One of the hardest things to grasp when starting to dehydrate raw foods is having an understanding of when things are “finished” dehydrating.
You’ll notice that most dehydrator recipes don’t offer nice, tidy dehydrating times. This is because the moisture content of ingredients can vary greatly (ex. was it a super dry tomato or a really wet and juicy tomato?).
Also, your climate and the moisture content in the air vary depending on the seasons so the dehydrating times vary a lot.
(I know, it can be kind of frustrating but you’ll learn quite quickly.)
So how the heck will you know when things are done? Tasting is the easiest way.
At the beginning, the best thing you can do is to be around in your home while you’re dehydrating.
When you’re just starting out, I recommend putting something in the dehydrator first thing in the morning on a weekend day so that you can check it throughout the day every few hours.
Usually it’s easy to tell when it’s not done yet…. “Eww, it’s still all wet and soggy looking!”
But once it starts to look basically dry, that’s when it gets hard to know when to stop dehydrating.
At the beginning when I was first dehydrating foods I would overdry everything, especially if I went to bed with the dehydrator on. When I woke up in the morning I’d wake up to really dried out recipes that tasted super dry and boring ("cardboardy!"), and I would regret having put them in overnight.
Storing your dehydrated recipes
I don’t store my dehydrated recipes much because they get eaten up so fast in my household!
Short-term storage:
Short-term storage items (semi-moist entrees or snacks, such as veggie burgers or pizza crusts etc.) should be tightly sealed (ex. ziploc bag) and stored in the refrigerator or freezer.
Just like anything else, dehydrated foods can go bad so be mindful and if something starts to smell off or look a bit funky–toss it.
Long-term storage:
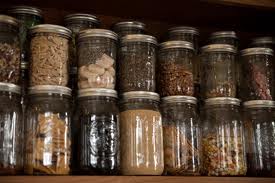
If you want to dehydrate for long-term storage (for example, if you want to take all the tomatoes from your garden, turn them all into sun-dried tomatoes and store them in a jar all winter) you absolutely must dry them out COMPLETELY so that there is no moisture left in them. If you leave any moisture content in them they will go rancid.
An excellent way to check whether there is any moisture content left in them before storing is to take a piece out and squeeze it very firmly between your thumb and your forefinger. If it is completely dry you shouldn’t be able to see any movement at all. However, if you squeeze it and it gives a bit (and you can squish it with your fingers) then there’s still moisture in it and you need to dehydrate it for longer.
In all honesty, if I was dehydrating for long-terms storage I would go higher than 105 degrees otherwise it could take days and days and days and you might never get rid of all of the moisture if you live in a humid climate.
Long-term storage items (dried herbs, sun-dried tomatoes, super-dry crackers etc.) should be kept in a sealed container in your dry pantry or in your freezer. Remember, they must be completely moisture-free if you want to store them over the long term in your pantry!
How much dehydrated food should you consume?
Dehydrated foods are usually high in fat (nuts and seeds), devoid of moisture and have less living enzymes than totally fresh foods. However, they are still so much healthier than the junk most of us used to eat!
You certainly don’t want to be eating dehydrated food for breakfast, lunch and dinner. This wouldn’t be a balanced way to eat, nor would it be practical because you’d need to be dehydrating 24/7.
Dehydrated foods are nice extras. They are exciting! But you don’t want to feel that the only “good” things in your raw food life are dehydrated recipes because that will get you into big trouble because dehydrating all the time is not realistic on a daily basis. (I usually dehydrate 2-3 times per month.) In order to ensure your success with raw food you must have an arsenal of super easy non-dehydrated recipes that you can whip up in less than 15 minutes–with no dehydrating required. Some of these recipes include green smoothies, fettuccine alfredo, raw cheese sauce, ranch dressing, mock tuna salad, raw egg salad, nut pate, rice pudding, chocolate raspberry pudding, salads, blueberry crumble, raw brownies, raw chocolate icing, lemon poppyseed balls, strawberry “milkshakes” and more.
Final tips from The Rawtarian
- Honey doesn't dehydrate. (It will never become dry.) So don’t use honey in your dehydrator recipes! Use agave nectar or maple syrup or dates instead.
- Remember that everything will shrink once dehydrated! Depending on their moisture content, items can be reduced by 2/3 to 1/2 of their original size.
- Do not dehydrate sweet and savory items in the dehydrator at the same time! I have been known to do it sometimes, but it always makes the sweet things take on the taste of the savory things…which is not what you want!
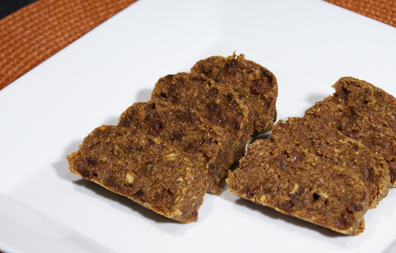
- Don’t try to dehydrate a huge, massive thick “loaf” of anything. Instead of trying to make a thick “cake” or a thick “meatloaf”, instead shape everything into “slices of cake” or “slices of meatloaf.” This way they’ll dehydrate through much better because the air can penetrate more of the recipe.
Bonus: Audio Training
In this audio training, The Rawtarian covers this content in over 30 minutes of audio training. Listen to the audio training right now by clicking here.
Assignment:
- I've turned on my dehydrator.
- I've got parchment paper in the house.
- I've read The Dehydrating Times :)
- I understand that if storing for the long term all moisture content must be removed to avoid spoilage.
- I've listened to the audio training module.
Once you have completed the assignments in this module, please proceed to the next module right away by clicking "complete."
FREE Raw Recipe Package
Subscribe to newsletter below. Get the 11 Best Raw Recipes (PDF E-Book Package) instantly.
The Rawtarian Recipes


Latest Certifications
-

kami_kev_5
Low-Fat Raw CleanseAugust 22, 2019 -

theartluva
Low-Fat Raw CleanseMay 22, 2019 -

marial4366
Raw Baby Steps ProgramMay 12, 2019 -

Mona
7-Day Raw Summer ChallengeJuly 5, 2018
What's Being Talked About